Homebridge on TrueNAS Scale
This post is going to cover how to setup Homebridge on TrueNAS Scale. The directions here apply to version 22.02.4 of TrueNAS scale and may need to be adjusted slightly if running a newer version. Homebridge allows you to take your IoT devices that don’t currently have Apple HomeKit support and add them to HomeKit. TrueNAS Scale doesn’t have an official app for Homebridge or one in the TrueCharts repo. Thankfully Homebridge does have a Docker implementation so you can add it to TrueNAS manually.
Disable mDNS
Homebridge runs its own internal copy of mDNS, so if you leave mDNS enabled inside of TrueNAS as well it will generate a large amount of errors in the Homebridge logs and may not actually start. Disabling this may impact your TrueNAS setup depending, but that will depend on how you have TrueNAS configured as well as your larger overall network configuration. From the TrueNAS help popup: “Multicast DNS. Uses the system Hostname to advertise enabled and running services. For example, this controls if the server appears under Network on MacOS clients.”
With that warning out there, this section will walk through how to disable mDNS in TrueNAS Scale.
Open up the Network menu in TrueNAS then select the Settings button in the Global Configuration panel.

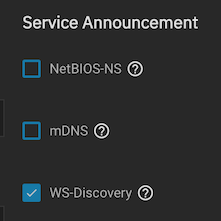
In the Global Configuration flyout, uncheck the mDNS option and then save.
Add storage location for config and files
TLDR; In your web UI for TrueNAS go into storage and add a dataset to store your config and data, then skip to Create docker image
This section is very specific to how you have your storage configured in TrueNAS Scale, but will include how I set mine up here for the rest of the instructions.
In the storage menu, pick the pool that you want to add the config storage to. In that pool open the dataset menu using the three dots at the far right of the dataset row.

In the dataset menu select Add Dataset.

In the Add Dataset flyout the only option I will set for this is the name and a description. In this case I am using the name “homebridge”, and the comment “homebridge config”. The remaining options I left as is and will depend on the options that you have defined for your parent dataset. Those options wont have an impact on this setup.
Create docker image
Now that a storage location is configured, change to the Applications menu and select “Launch Docker Image”.

In the Launch Docker Image flyout setup the docker container. The below settings are the defaults as provided by the docker repo page on github. Any items not specified can be left as the default, adjust the settings as needed to fit your setup.
- Application Name
- Application Name: homebridge
- Container Images
- Image repository: oznu/homebridge
- Image tag: latest
- Container Entrypoint
- no changes
- Container Environment Variables
- no changes
- Networking
- Provide access to node network namespace for the workload: checked
- Port Forwarding
- no changes
- Storage
- Configure Host Path Volumes: select Add
- Host Path Configuration
- Host Path: select the dataset created earlier
- Mount Path: /homebridge
- Host Path Configuration
- Configure Host Path Volumes: select Add
- Workload Details
- no changes
- Scaling/Upgrade Policy
- Update Strategy: Kill existing pods before creating new ones
- Resource Reservation
- no changes
- Resource Limits
- no changes
- Portal Configuration
- no changes
- Confirm Options
- Save
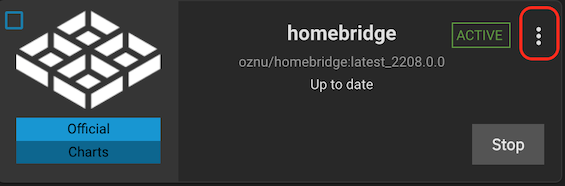
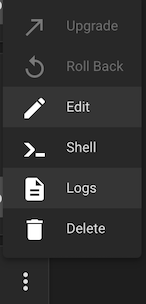
After saving, the application will display in the application card listing as deploying. Once deployed and the status changes to Active, open up the logs to confirm things are working. To view the logs select the three dots in the top right corner of the application card and select Logs.
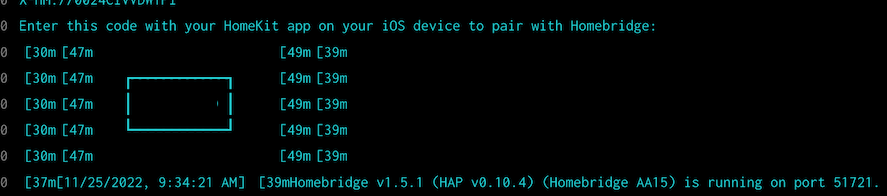
In the popup for the logs, leave things default and select Choose. If things are working you should see towards the end of the log entries a few rows indicating the code to use with HomeKit to setup Homebridge. The setup of all of that is outside the scope of this post, but if it is there things are working.
Troubleshooting
If the logs keep scrolling and there are messages about mDNS that is because the mDNS option is still set in TrueNAS and needs to be disabled.
If the logs are indicating there are permissions issue, make sure that the dataset setup earlier is accessible. The app will default to using the root user, if the setting to override the Container User and Group ID was changed in the Workload Details section when setting up the container this may also cause issues with permissions in the container.
Jobs Done
At this point you have is an active up and running instance of Homebridge running on Docker in TrueNAS scale using port 8581. To access the web UI open a browser to http://IP_ADDRESS:8581 replacing IP_ADDRESS here with the IP of your TrueNAS Scale server. The details of setting up that instance will be specific to you, and more details on that setup can be found on the Homebridge Wiki